Crafting
Birthday Boy on a Budget
A week ago my little boy turned 1! I can’t believe it. A year ago I was blessed beyond measure with my little baby boy, who we named Garrett and has brought an enormous amount of joy into my life. And of course, in normal mom fashion, the one year old birthday party became a thing. I set out to not make it a big deal… but I was just having way too much fun! But one thing I did stick to was my budget. I was able to throw a fairly large birthday party and not spend too much money. It took lots of lists, preparation, help, delegation, and lots of time. But I loved it!
My best advice in planning a party: Simplify. Say no to things. Do little touches of pop. You don’t need every decoration or every DIY you see. Choose a few things that you can have fun with. Don’t break the budget or break your sanity! Within reason you can have a cute, fun, creative birthday party!
A couple tips:
- Pick a theme or color
- Make a general budget
- Sale shop a little bit online
- See if family wants to contribute to the party
- Use a food favor or something people can use
- Wait to buy your baby presents until after the party and you see what they get
Decor:
- Bought plates, utensils, and napkins at the dollar store in my color
- Chose a few things on etsy that I could print out myself and make
- Got some ideas on pinterest and etsy and made them myself
- Used amazon prime for puff balls, bean bags, and bubble machine
Activity:
- Choose a few activities for kids
- Lawn games
- Music
- Food
Snacks:
- Buy kid snacks and juice boxes at Costco
- Otter pops or popsicles in the
A Mother’s Day Craft that Will Hand the Moms in Your Life a Smile
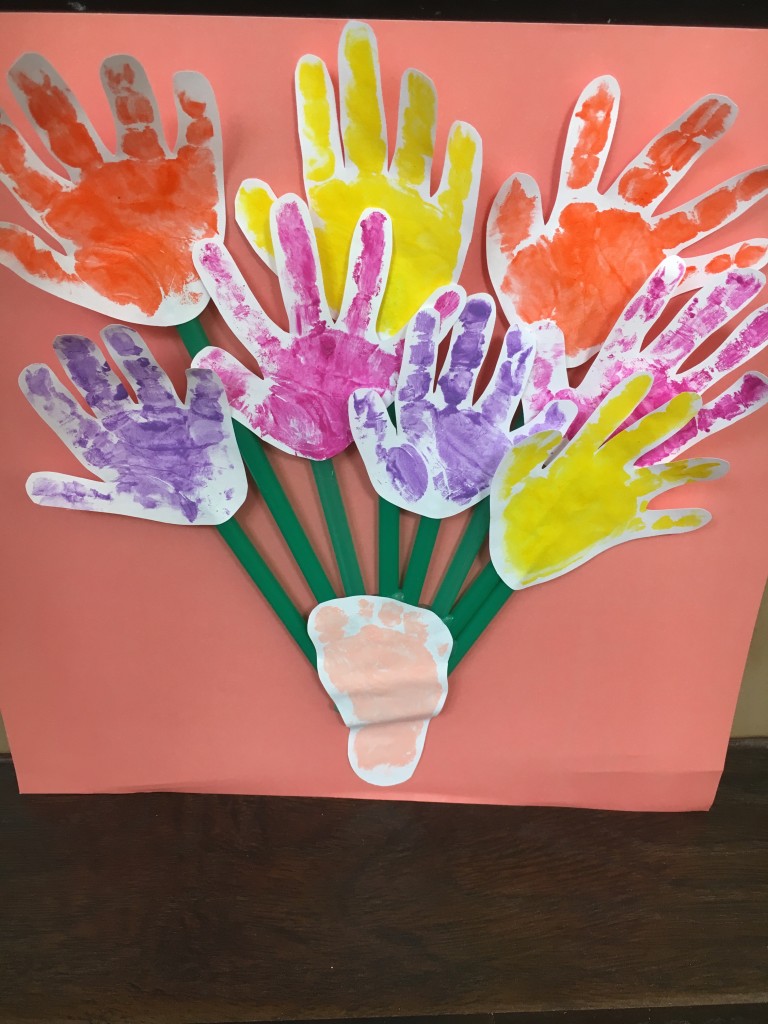
It is hard to believe that I will be celebrating my second Mother’s Day already! Although my little one hasn’t started making me homemade crafts – I’ll give her a break, she’s only 14 months 🙂 – I can foresee in my future these being my most treasured gifts! Here is a fun craft that your kids are a part of that will definitely ~hand~ the moms in your life a HUGE smile!
 What You Need:
Acrylic Paints
Paint brush
Cardstock or construction paper
Green straws, dowels, tongue depressors
(I used green Starbucks straws…I always grab extras when I go to have them on hand at home…shh don’t tell :p )
Scissors
Hot Glue Gun
A Child’s Hand and Foot
What To Do…
- Brush a good coat of paint onto your child’s hands and press on the paper to create the handprint. Apply more paint as needed and make a few handprints on each page. Repeat with other colors of paint – fully cleaning the hand and paintbrush with the previous color of paint. Repeat with one foot – this will serve as your “vase”. If you have multiple kids, put their name on each of their own handprints or do certain colors for each child.
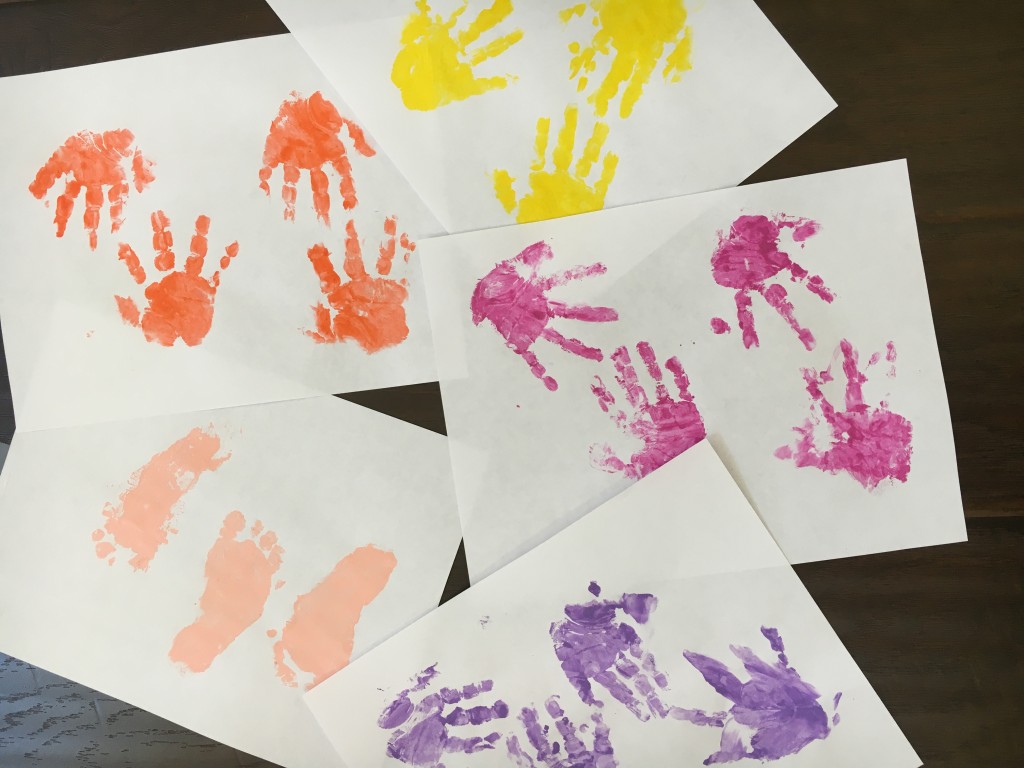
- After they have fully dried, cut around each handprint and footprint.
- Arrange on a 12×12 piece of cardstock to look like a bouquet of flowers.
- Use the hot glue gun to secure the handprints to the straws (or dowels or tongue depressors; or you can even use a green marker to draw the stems) and under the footprint vase. Cut the straws different lengths so you can arrange the handprints more visibly. Secure the “flowers” to the paper with a dot of hot glue behind each one.
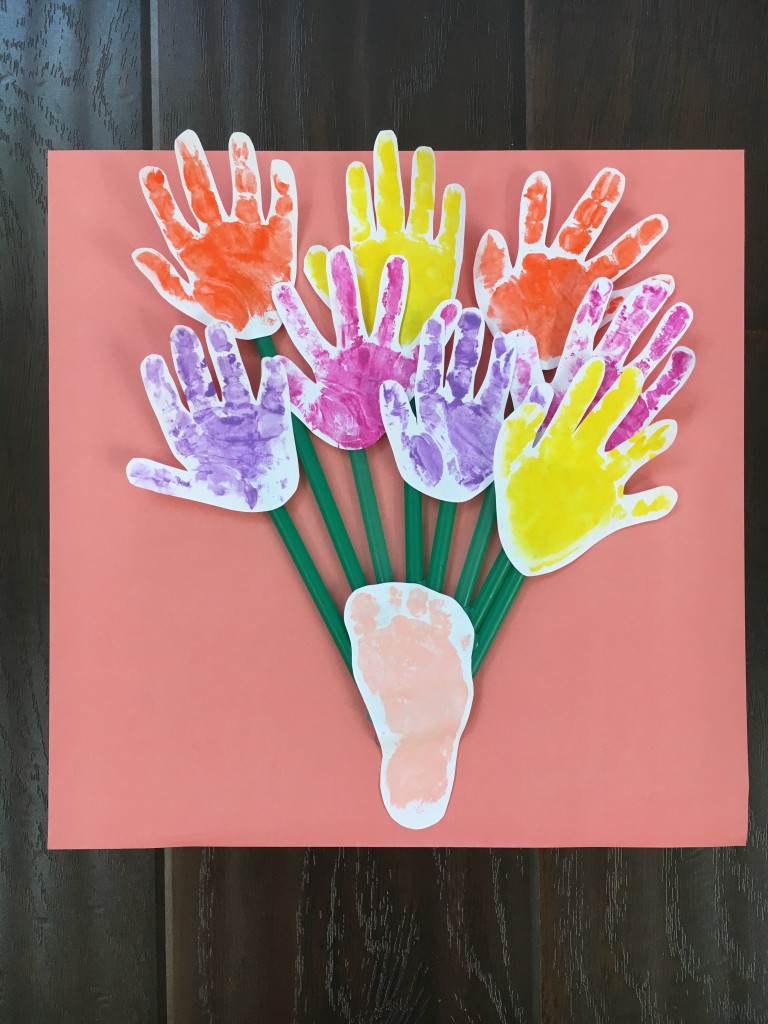
- Write a cute message at the bottom
Easter EGG-ercise – Get Your Bunny Tails Moving
There are so many fun ways to incorporate fun and fitness into your family life. My sister sent me this idea from The Seasoned Mom, and you know me and exercise – I HAD TO TRY IT!
My girls are obsessed with Easter egg hunts. Do you follow us on Instagram @growingweisser? I shared one of our favorite Easter activities is the Egg Hunt at Disneyland Resort. You find character eggs all over the parks or even Downtown Disney and get a cute collectable egg to take home (when you purchase a map!)
What you need:
plastic eggs
buckets
paper and pen
First I wrote out fun exercises in paper. Then I folded the paper up in the eggs.
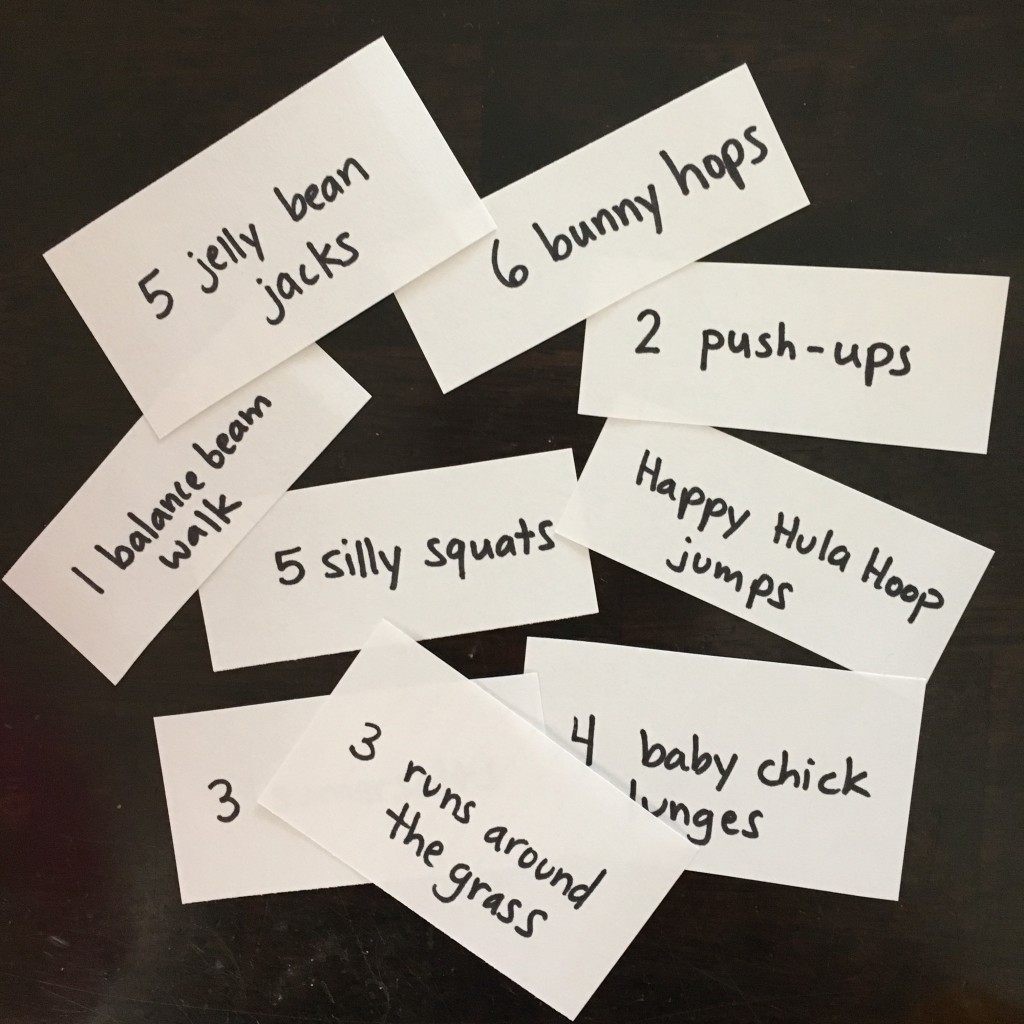
Since the girls like egg hunts so much I hid the eggs first for extra “egg-ercising.”
Then I let loose the fun! I told the girls how many eggs they could each find. After they found the eggs we opened them one at a time and did the exercises! (super cute video on our Instagram!!)
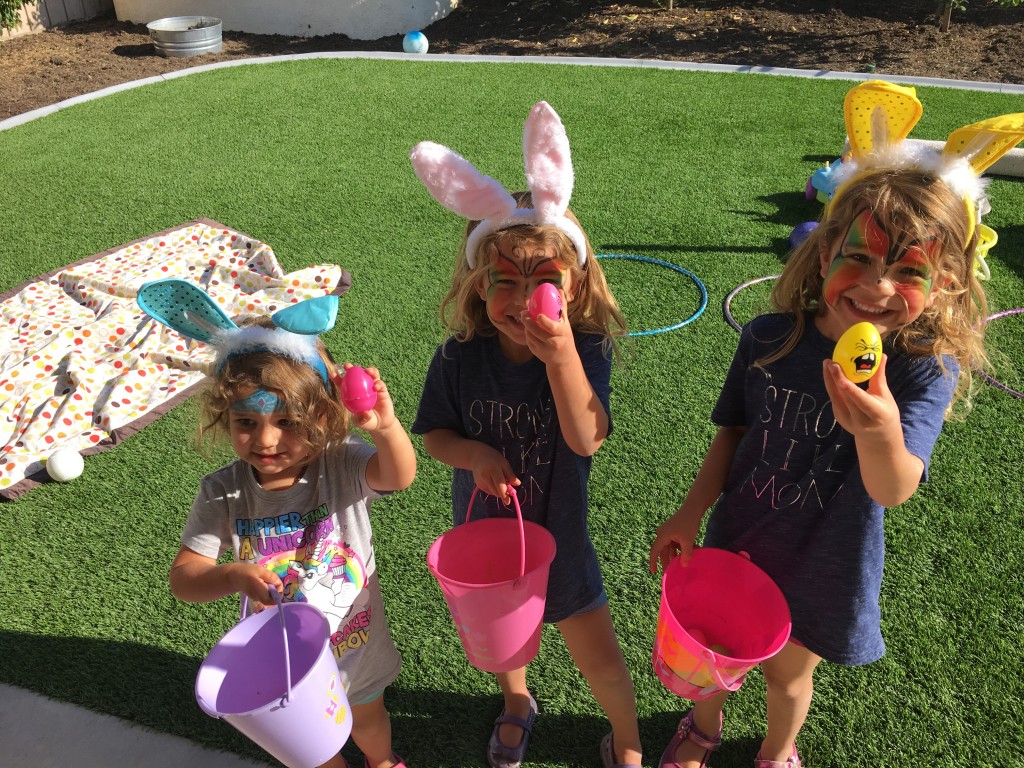
The girls loved this so much we played for HOURS!! And they have pretty much asked to do it every day since. So this activity is definitely mom-approved!
Let me know if you try it!
 …
…
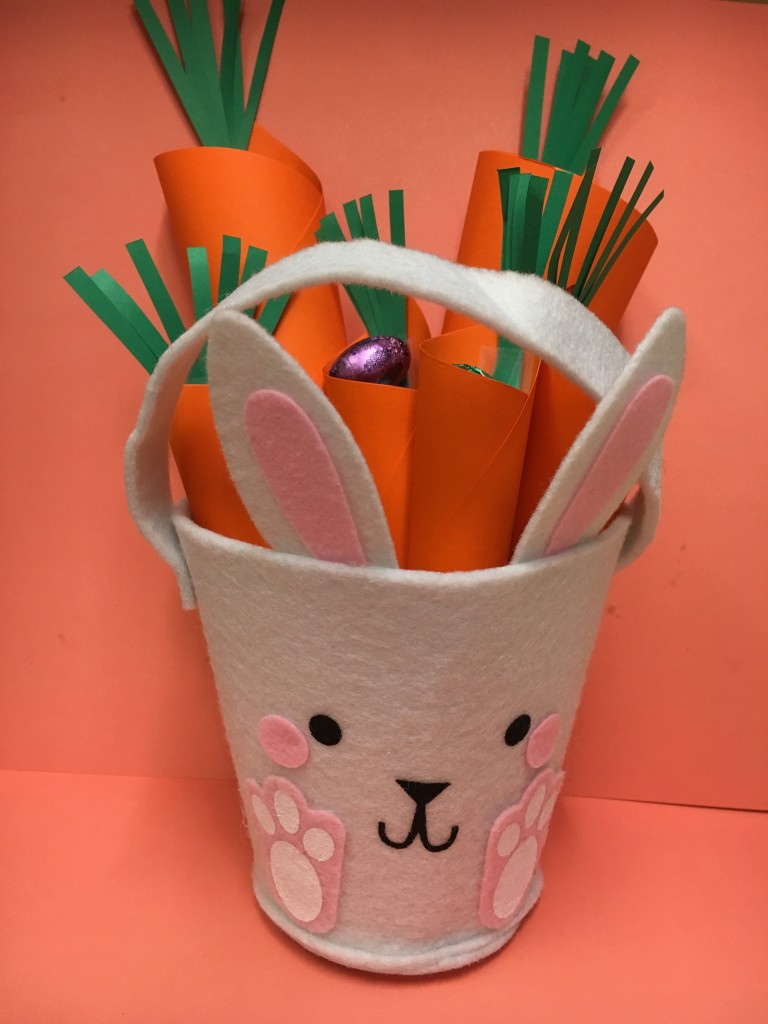
Carrot Candy Cones
Easter is on Sunday! Although it is important to remember that it is really about Jesus, I love any excuse to give or create a gift; so I love Easter baskets! I adapted a fun craft from “Emma Owl” that is VERY SIMPLE and a very cute addition to your Easter baskets this year!
Carrot Candy Cones do not require many items except for some simple household items and your favorite Easter treats. In our home, our favorite holiday (especially Easter) chocolates and treats have always come from See’s Candies from as far back as I can remember. I loved finding a craft to combine with my favorite chocolates 🙂 And, this is definitely a craft that kids can help with, too!
What You Need:
Construction Paper – Orange and Green
Tape
Scissors
Stapler (optional)
Your favorite Easter chocolates or treats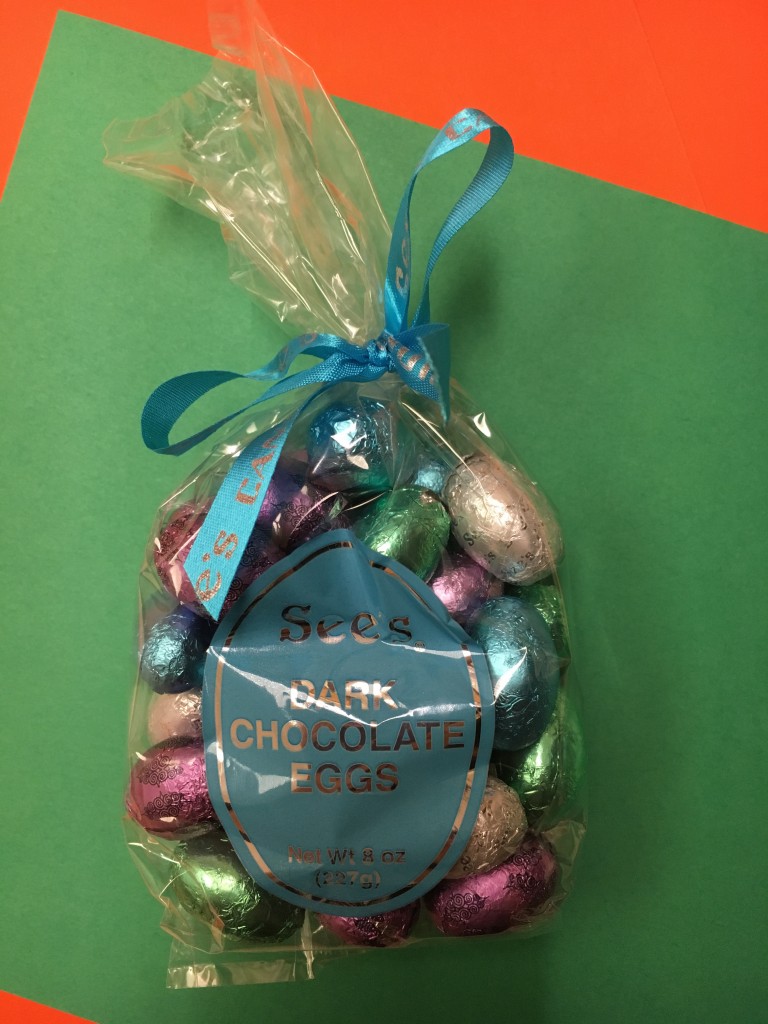
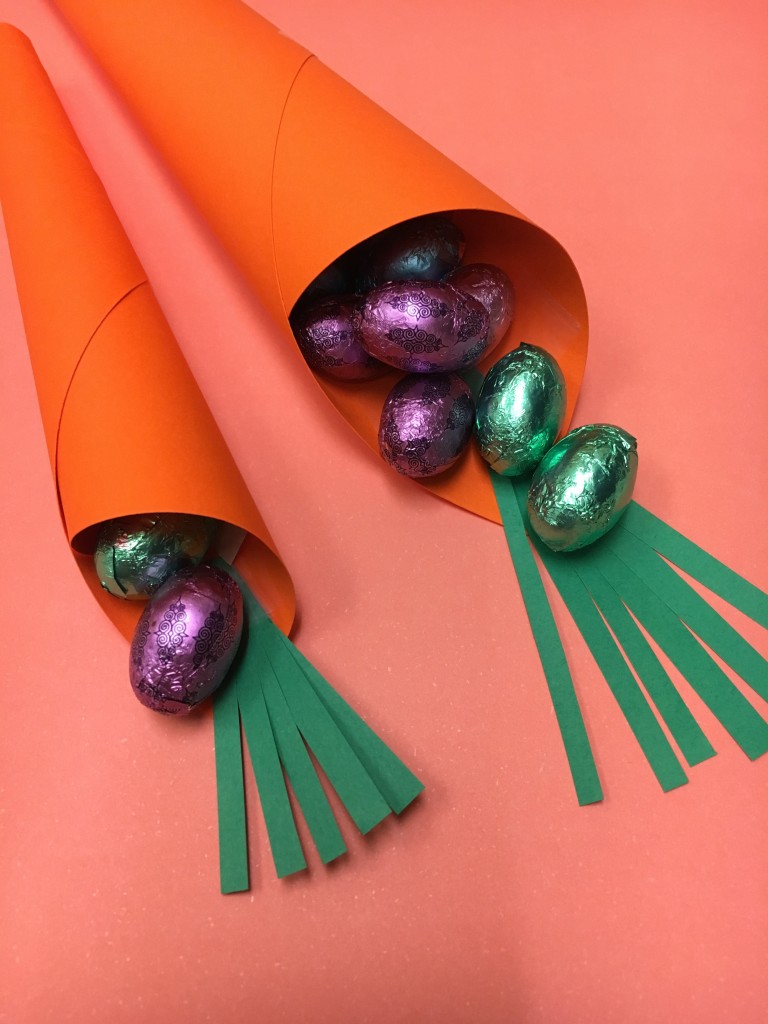
What To Do:
Carrot Candy Cones can be made in a large size or small size. For the large size, you will use a whole 8.5×11 orange sheet. For the small size, cut a 8.5×11 paper in half. Take the short edge and roll toward the long edge to create the cone. Tape at the outside corner.
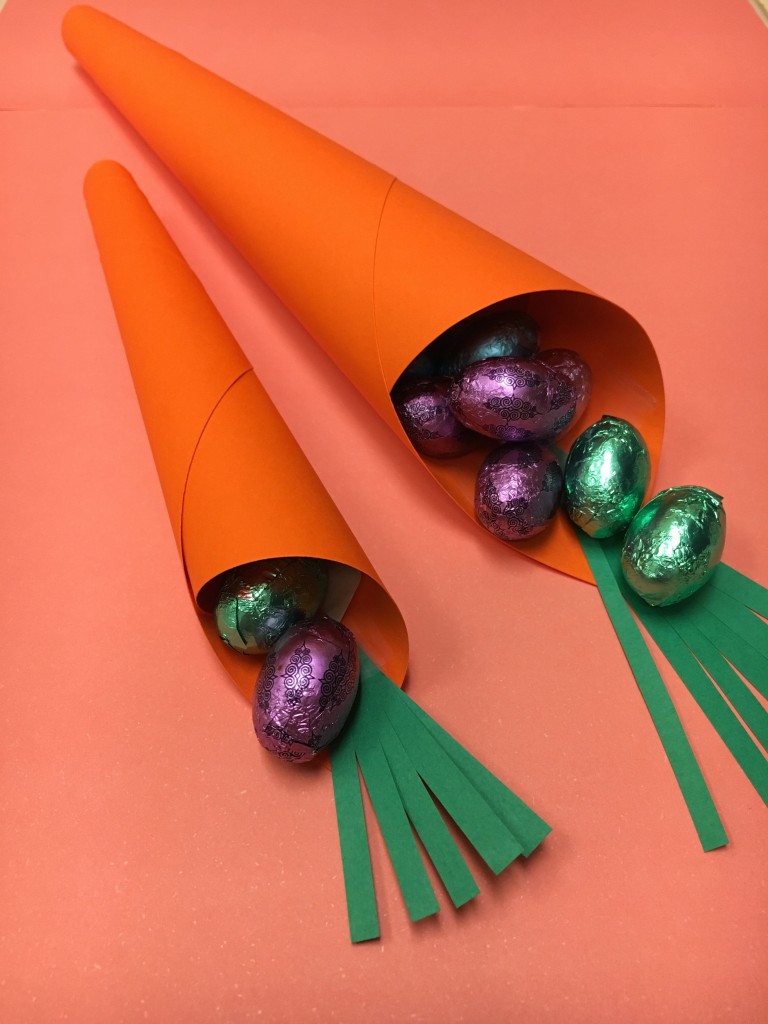
Cut small pieces of the green paper to create the stem. Tape the pieces together at the bottom and then tape the stem to the top of the carrot.
Fill with your favorite treat! If your treat is too small for the opening, put a small piece of tissue paper at the bottom before filling. After placing the tissue at the bottom you can also line the carrot with a ziplock bag (with the zipper cut off). The last option is to put additional tissue in the carrot to not have to fill it with as many treats (the large …
Read MoreEaster Craft to Share Love
Only two weeks before Easter Sunday and I am thinking of how I can bless others and at the same time expose them to new and exciting ways to add deeper meaning to their Easter celebration. I am always looking for how to creatively combine the fun aspects of Easter with the real reason that we celebrate Resurrection Sunday. I saw this website and really liked this free printable the blogger offered. So I downloaded it and made a basket full of Easter M&M treat bags to share with friends. I am hoping to invite them to our church for our Easter celebration if they don’t have a place to worship on Easter Sunday. I have found that in my community there are many women who want to feel like they belong. They do not want to be alone. They may be entering a new season of life and they feel unprepared. They may be facing some emotional hardship in their life. They may just need a friend to talk to and get advice from. Maybe when I am willing to take a risk and give a small gift of love and friendship to my neighbors or new acquaintances I might meet, it may open a door of communication. I serve and love a God of grace who brings peace, love, security and purpose. I want to share this love and grace with others. In the gospel of John 14:27, John quotes Jesus who says, “I give you peace, I do not give you what the world gives you. Do not let your hearts be troubled. Do not be afraid.” So this Easter season, I am going to make a basket of these little M&M treat bags and share them with others. I will be hoping and praying that this …
Read MoreDIY Personalized Photo Valentine
This is my daughter Ellie’s first year in school, so our very first Valentine’s Day exchange is coming up. I wanted to attempt something special, and then take Ellie to the store to pick out Valentine’s as a back up. My attitude towards Pinterest projects is I love them if I can confidently complete them.
So, I got to Pinning. There were a lot of great ideas, but sometimes I get frustrated with Pinterest because a Pin takes you to the wrong link, only a photo, or a post with no tutorial!!
I decided to do the photo card where you pose the child to look like they are holding a lollipop, so when you add the REAL lolipop to the card, it looks like they are presenting their friend with a GIANT lollipop!
I found a lot of adorable DIY photo Valentine’s, but only one with a tutorial and it required an application (Google Photo) that I don’t have. A little searching on Google, and I found I could do everything I needed with the Apple application, “Preview.”
DIY Personalized Photo Valentine:
Step 1: Take your photos
We tried a few different poses so I could pick a favorite. I ended up liking 4 of them, and used them all so there would be a variety of cards to give her classmates.
Step 2: Add text
On an Apple computer, open the application, “Preview.” I recommend duplicating the photo before editing so you have an original copy of the photo and a second to edit. Once the photo is open in Preview, click the icon that looks like a brief case to show “markup toolbar.” Click the “T” to add a text box. Write your text. Change the font, size, and color to your liking and move around on …
Read MoreEasy Homemade Ornament Craft
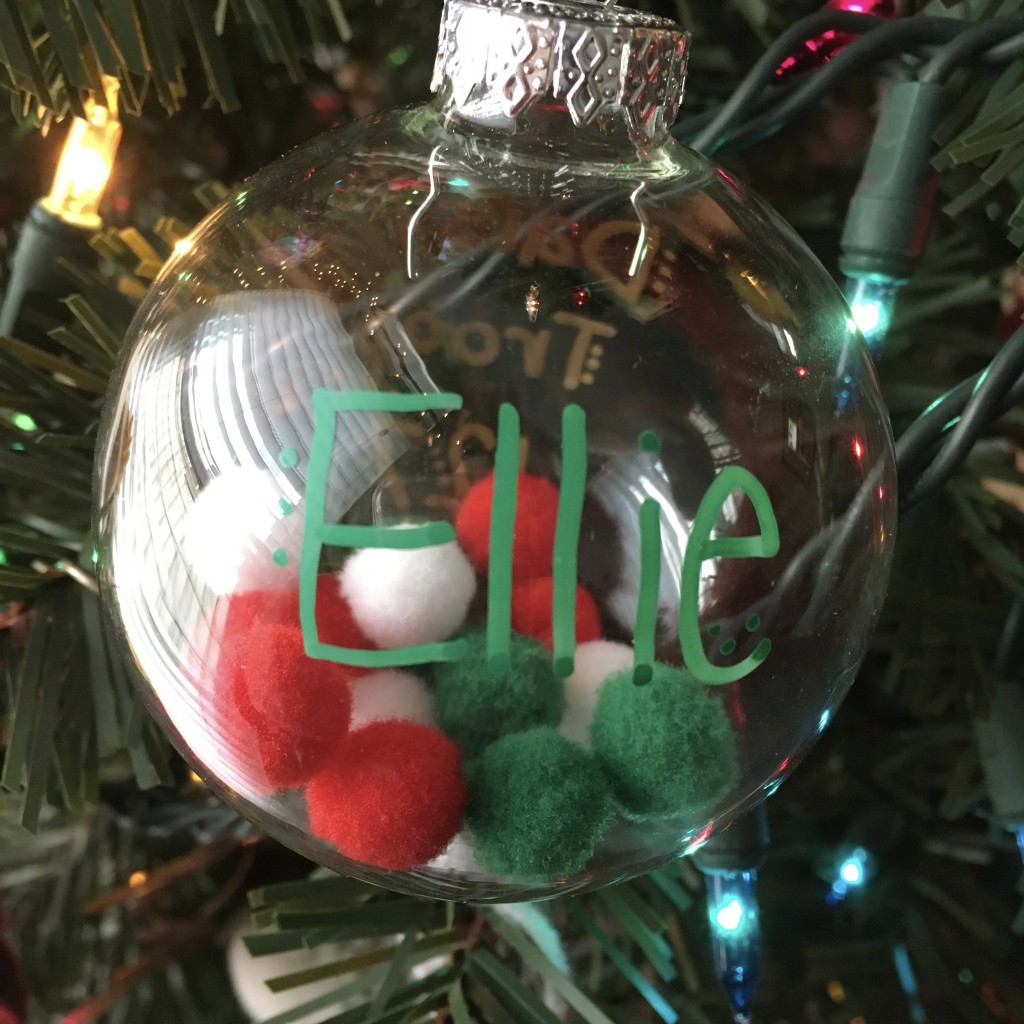
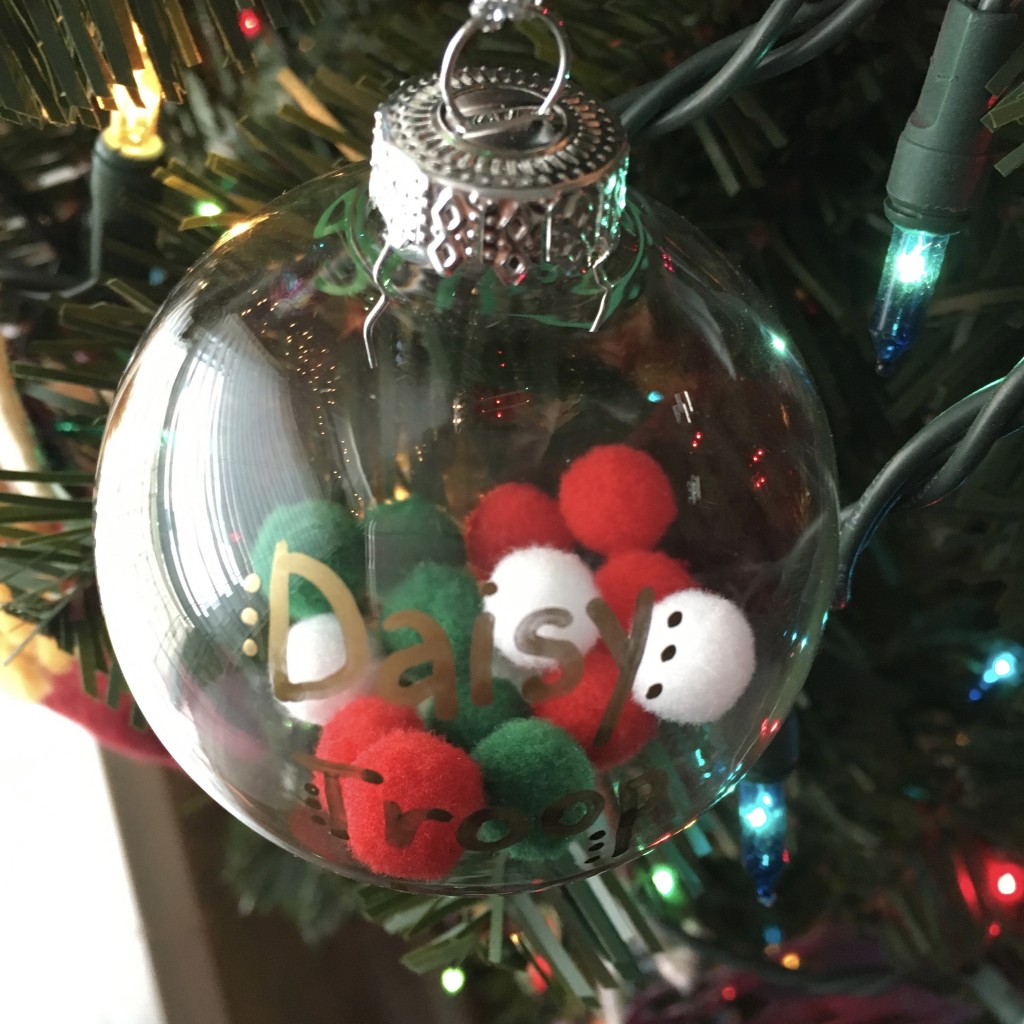
Looking for a last-minute easy gift or just a fun craft to do with your kids? This easy homemade ornament craft was super fun and quick to make.
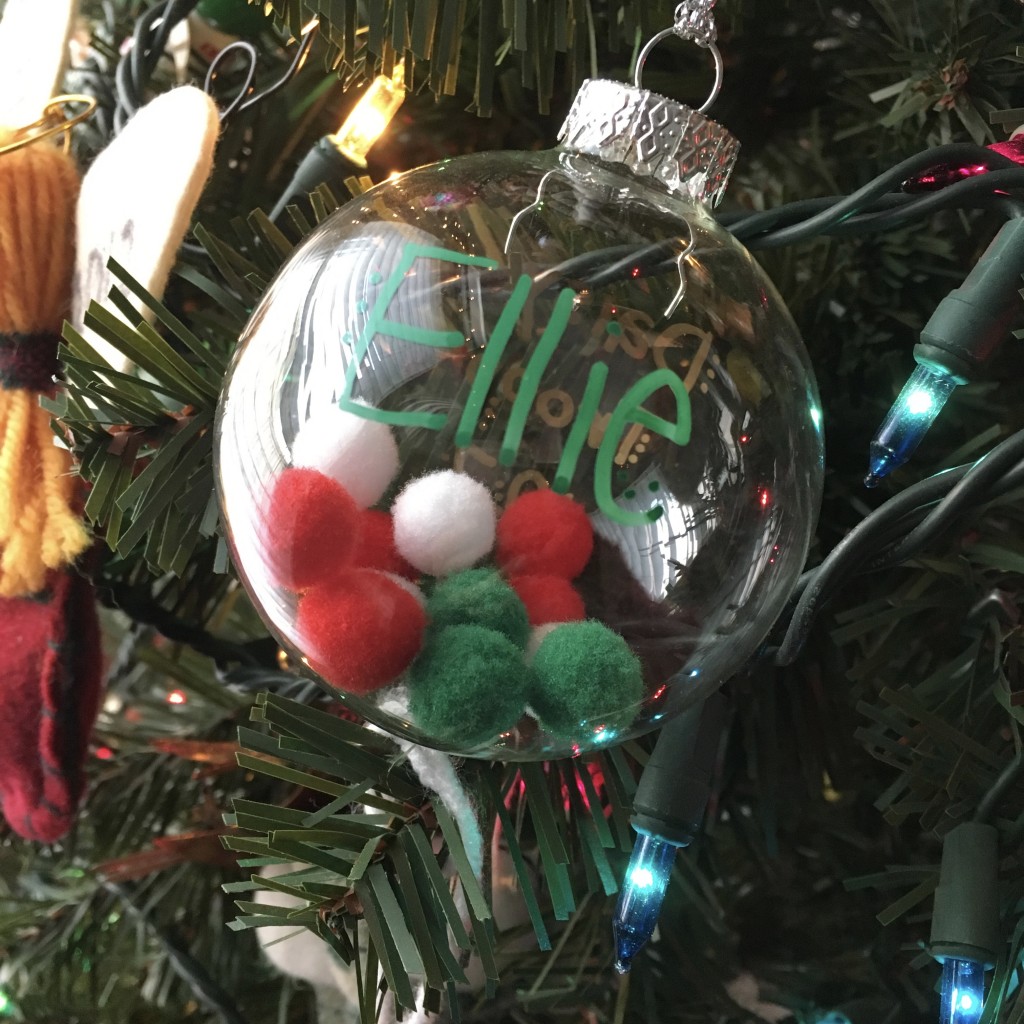
I was able to purchase all the supplies, make, and deliver all in the same day. I realized last minute (typical me) that we hadn’t made Christmas gifts for our Daisy troop. I make a quick stop at JoAnn’s (with lots and lots of coupons in hand) and found all the supplies I needed.
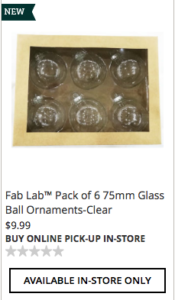
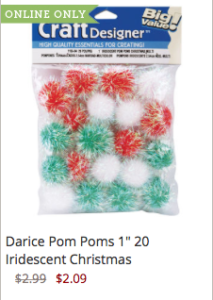
Supplies:
Clear Glass Ornaments
Pom Poms
Sharpie Paint Pens
I wasn’t able to find cute Christmas pom poms, so the girls helped me sort the variety bag. We made piles of all the red, green, and white pom poms then divided them evenly among the 6 ornaments. The girls really enjoyed putting the poms in the ornaments. It was a fun motor skill/math activity.
The next step was writing on the ornaments. I prepped the pens according to the directions on the pen, then looked on Pinterest for a really easy font to copy. Handwriting is not one of my skills, but I’m pretty good a copying, so having a visual helped!
I let one side of the ornament dry before I worked on the other side. I kept it simple and wrote the girl’s name on one side and our troop name on the other side.
And easy peasy, DONE!
Let us know if you try this craft! If you post on social media tag us @growingweisser!
…
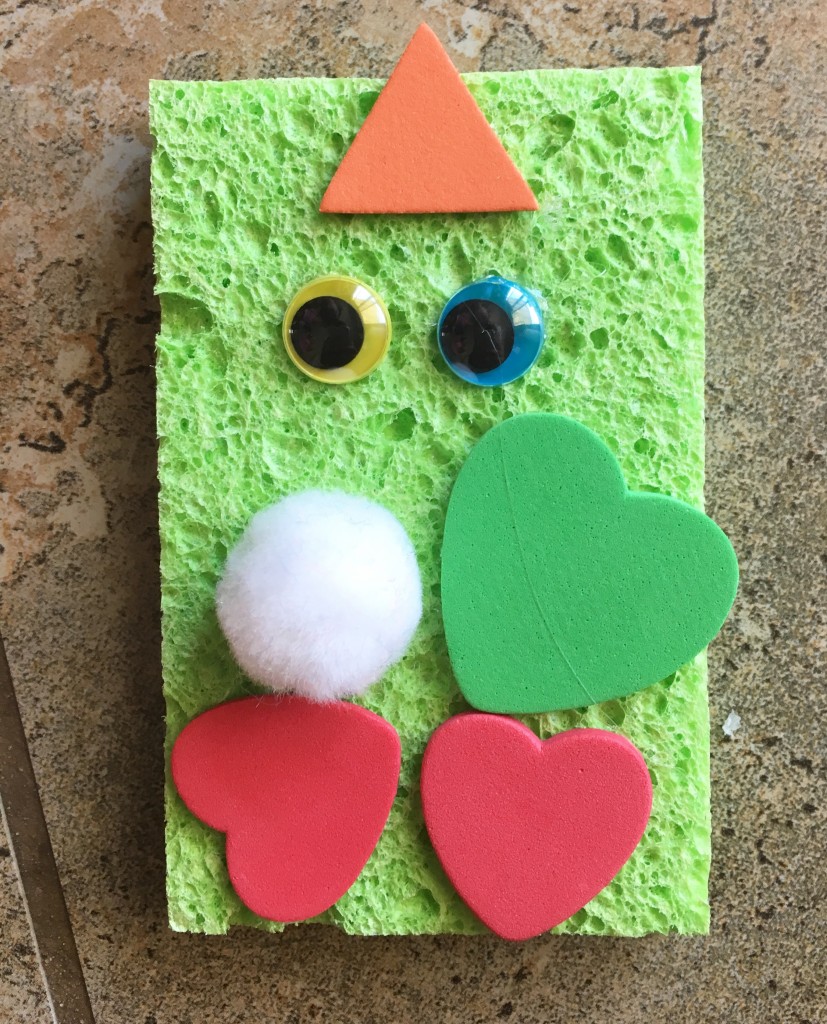
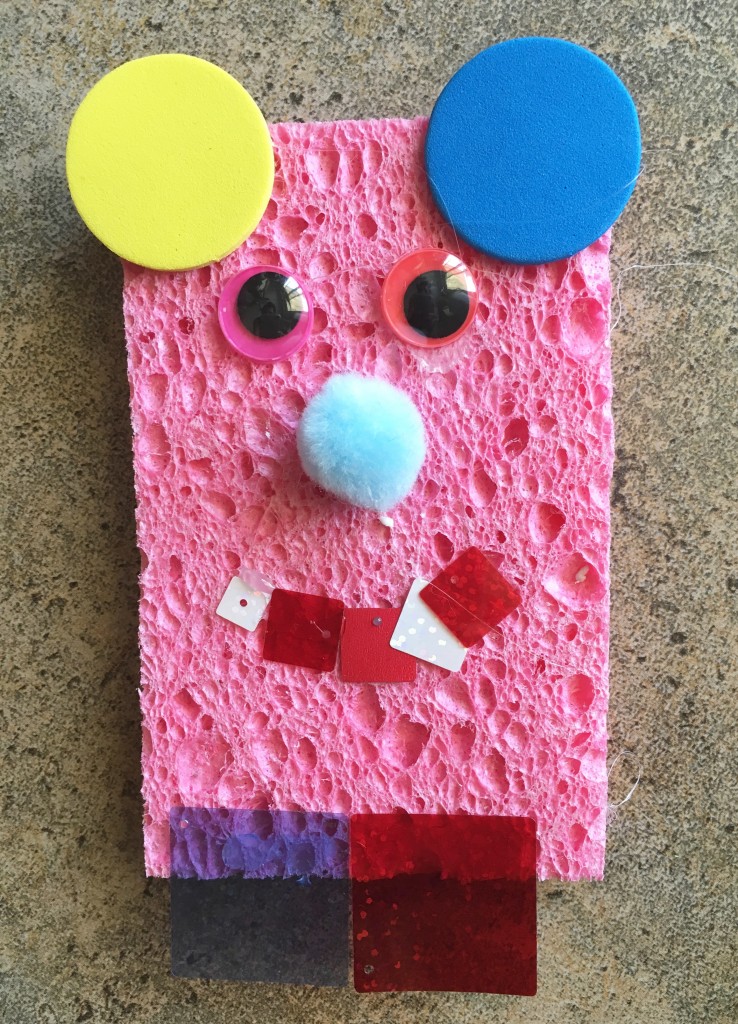
Sponge Puppets
Here is a great art project for a hot summer day when you want to have fun indoors or outside in the shade.
My daughter, Ellie, found the idea in her Highlights magazine. I bought sponges at the store and used other craft supplies from the house.
Supplies
Sponges
Craft Glue or hot glue gun
pom poms
googly eyes
foam shapes
confettie
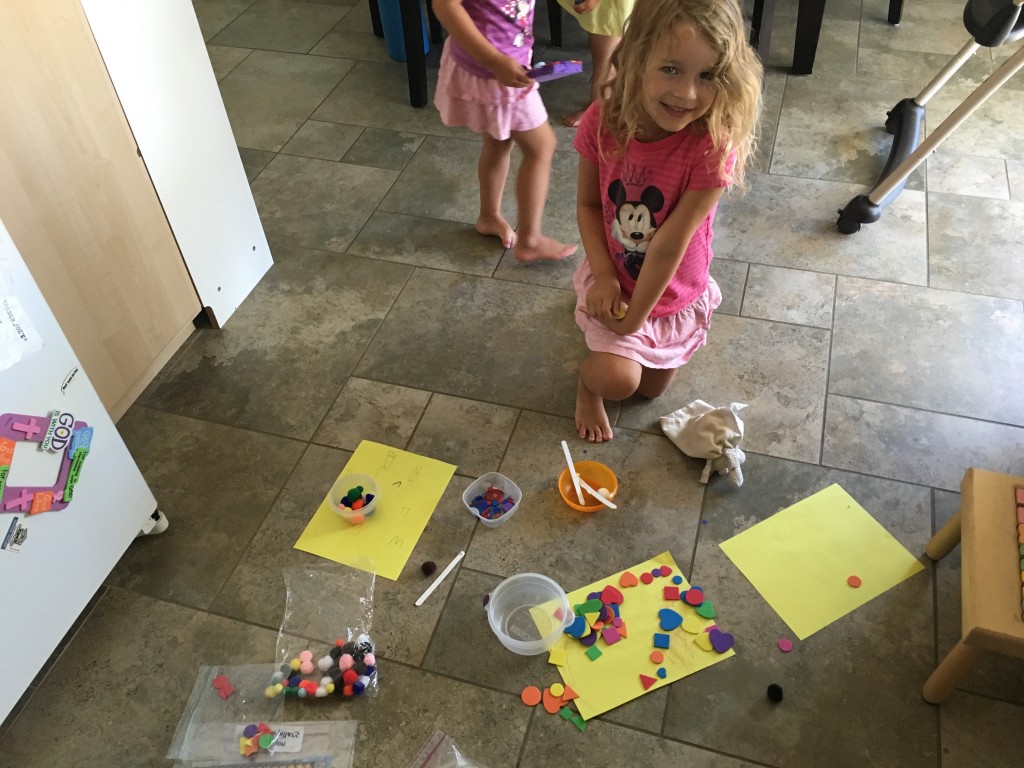
Instructions
Heat the hot glue. If you are using hot glue have the kids plan out their puppet by drawing a picture or placing the craft pieces on their sponge. Then allow the adult to hot glue the items on. Let dry for at least 1 minute. That’s it. Now you have a fun character for puppet shows or to display in your house!
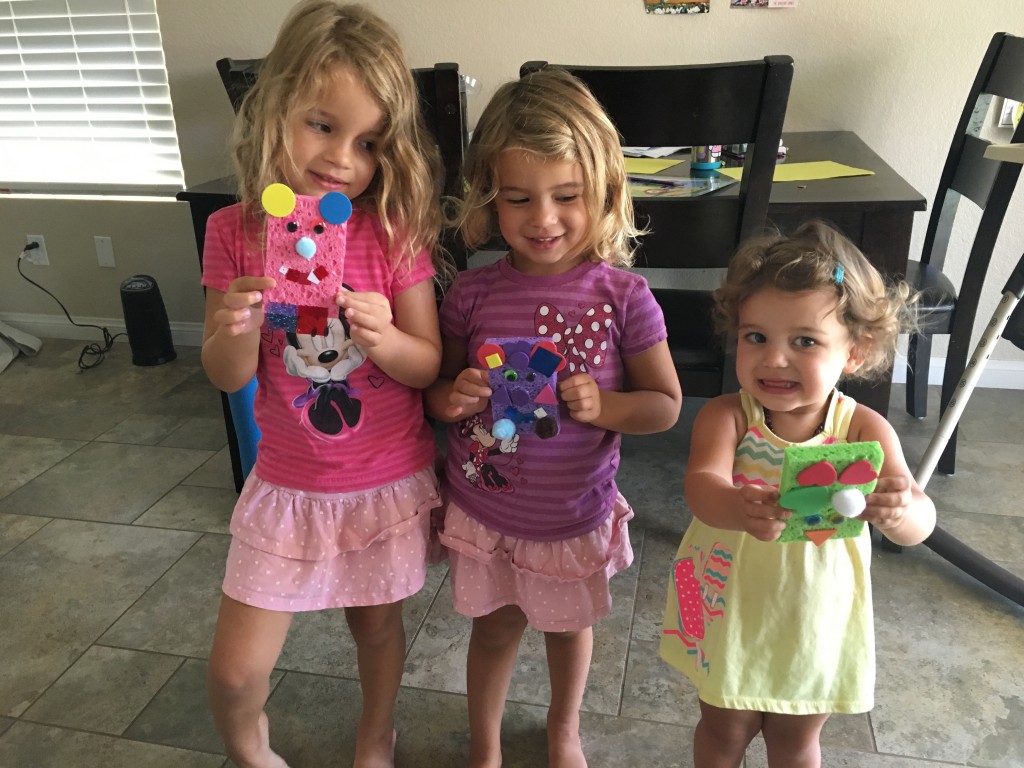
This was a really great activity to practice patience as the girls waited their turn for the hot glue gun. We practiced body parts like eyes, hair, mouth, nose, cheeks, and more. We also talked about shapes when choosing how to decorate our puppet.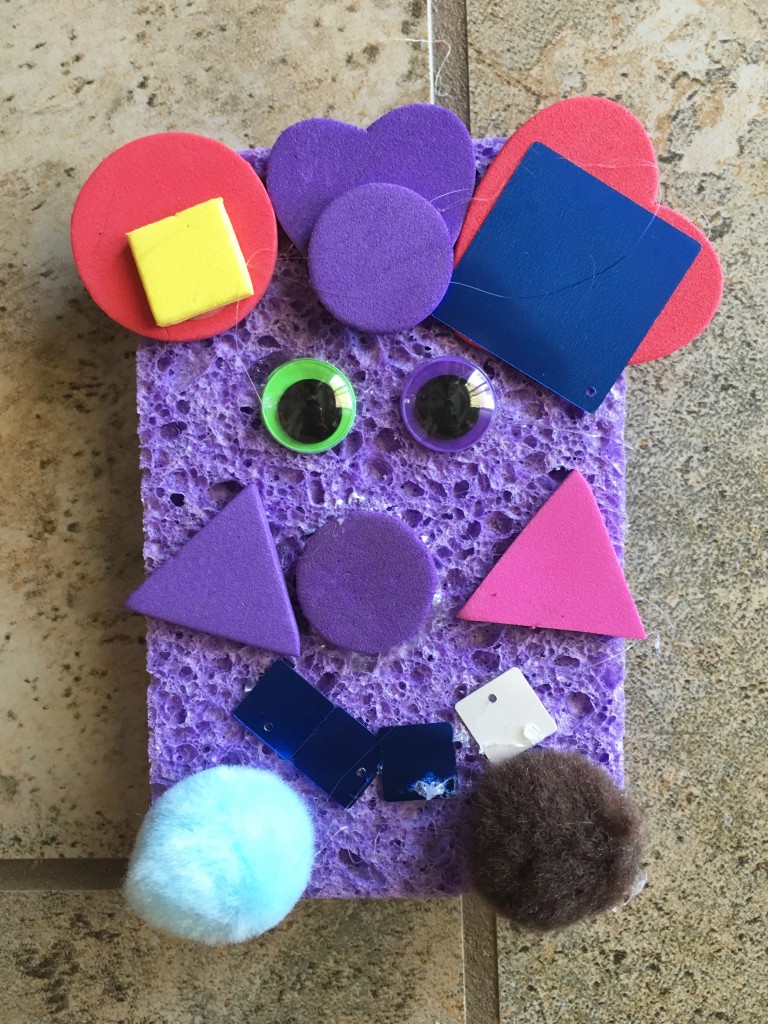
 If you try out this sponge puppet craft be sure to tag us on social media!
…
Recharge Your Summer with a Bucket List
We have made it through the holiday weekend of summer! What are you going to do for the rest of your summer? Here’s an idea to recharge your creativity for fun summer plans!
Have you made a summer bucket list? Have you been working through it? If you have, look back through it and add activities that you have thought of or heard of from friends that you haven’t done yet. If you haven’t made one, do it now! There is still plenty of time to do all the things that you have always wanted to try – fun activities in your community, trying new restaurants, free summer events, crafts, home adventures and more!
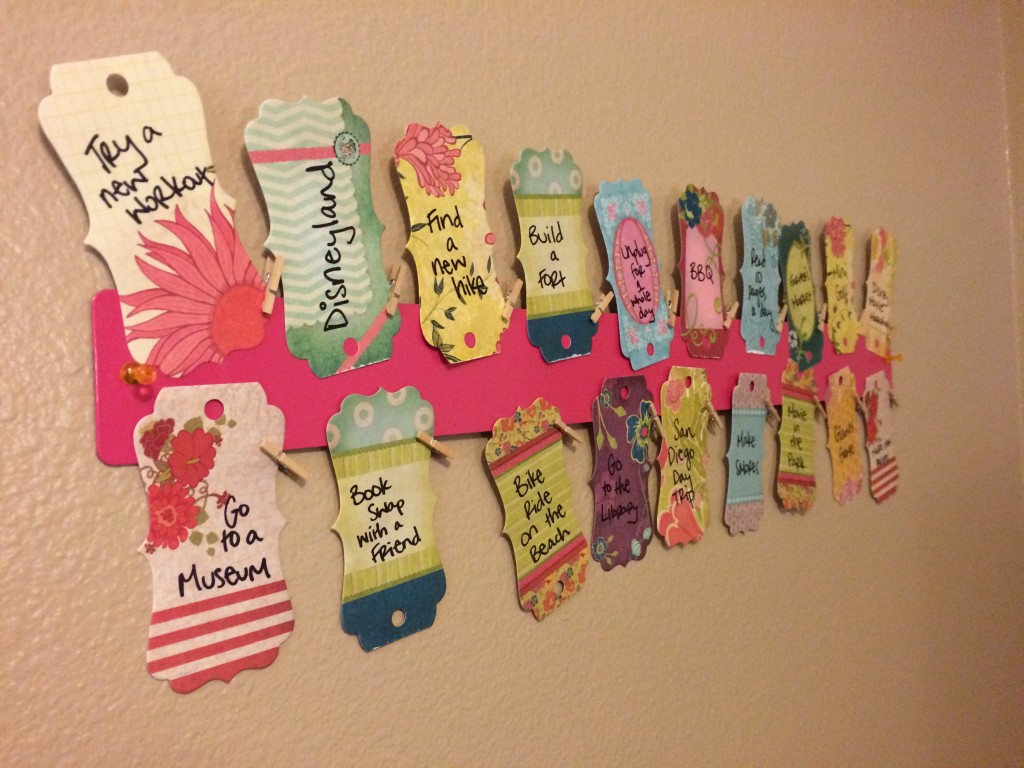
Here is a fun way to put up your Bucket List to see what activities to plan for the rest of summer!
All you need is…
1. Your Summer Bucket List
2. A Magnetic Strip
Find it on Amazon for a great price at the link below!
Three by Three Magnetic Strip Bulletin Board, White
3. Fun Paper
Try JOANN Fabric, Michaels, or your local craft store for packs of scrapbook paper…
…Paper Source…
…Amazon, too!
Fancy Pants Designs Burlap and Bouquets Decorative Tags, Large
4. Colored Pens or Sharpies
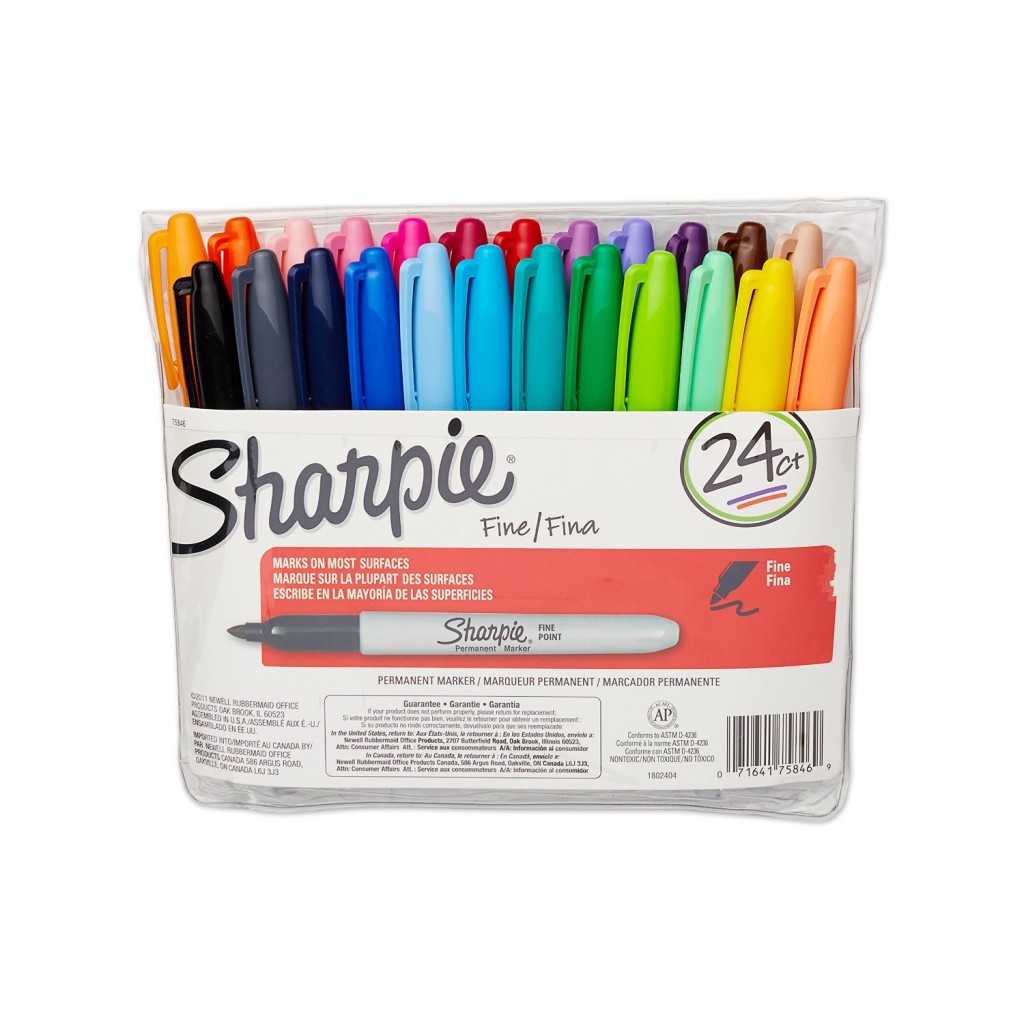
Sharpie 75846 Fine Point Permanent Marker, Assorted Colors, 24-Pack
5. Paper Punch to make shapes like the one below- Optional
Uchida – Clever Lever Xtra Giga Craft Punch-Merchandise Tag
And, it’s so simple! Write out your Bucket List activities on your paper. Use the magnets that come with the Magnetic Strip to post up each bucket list item. Mount your strip in a place where you will see it everyday and often! Then, get working on your list! You will feel so accomplished at the end of summer with a lot of fun memories and recharged …
Read More4th of July Crafts and More…..
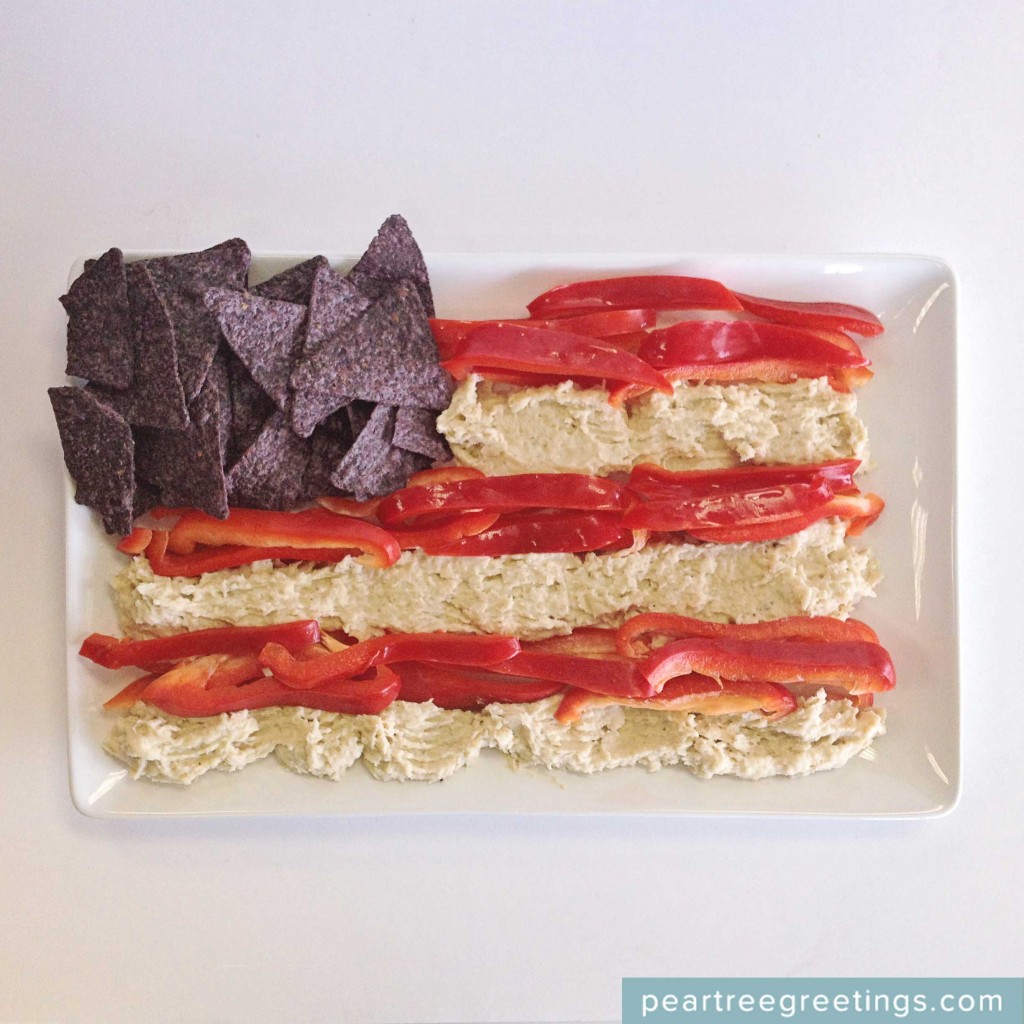
I love 4th of July! I love seeing the American flag waving, being reminded of the amazing freedom we have, and seeing the red, white and blue worn proudly! There are such fun crafts to decorate for your 4th of July celebration or to make apart of your day! I am sharing with you some of my favorite 4th of July crafts from fellow blog friends! Since food can be art, I have added some delicious 4th of July food ideas to make your treat SPARKLE! Check them out below…
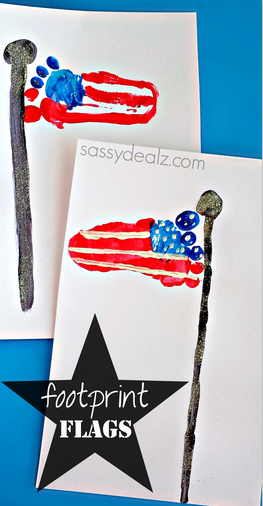
1. Handprint Flag or Footprint Flag
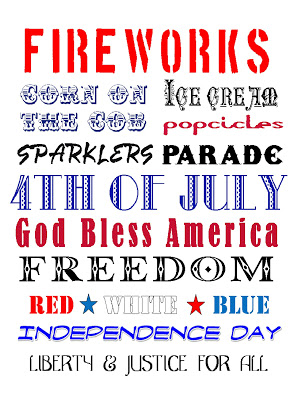
2. Free Printables Compilation put together by The Dating Divas!
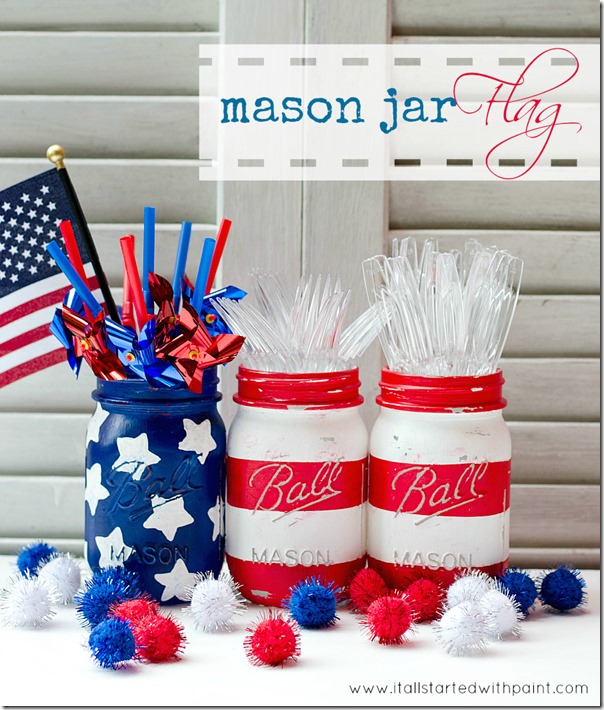
4. Red, White, and Blue Mason Jars
![]()
6. 4th of July Rice Krispie Treats from Lil’ Luna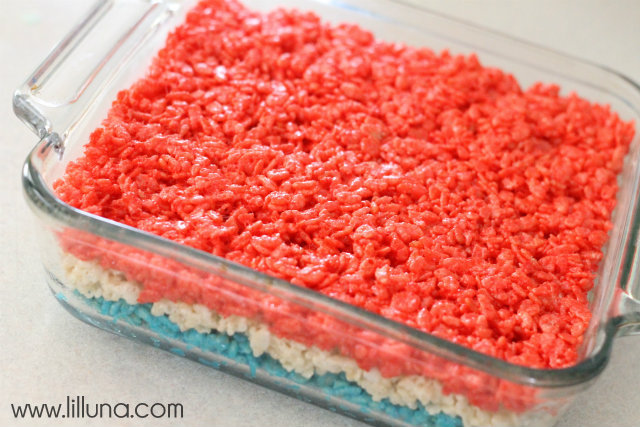
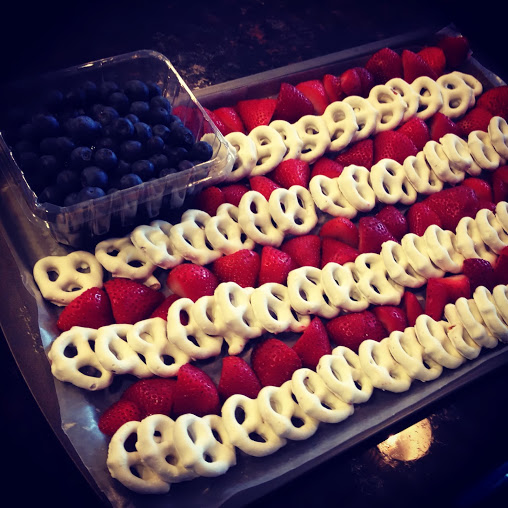
7. Red, White, and Blueberries
10. Check out some of our Growing Weisser Crafts…
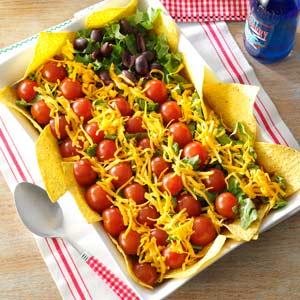
Use these Memorial Day crafts and Snacks for your 4th of July Celebration!
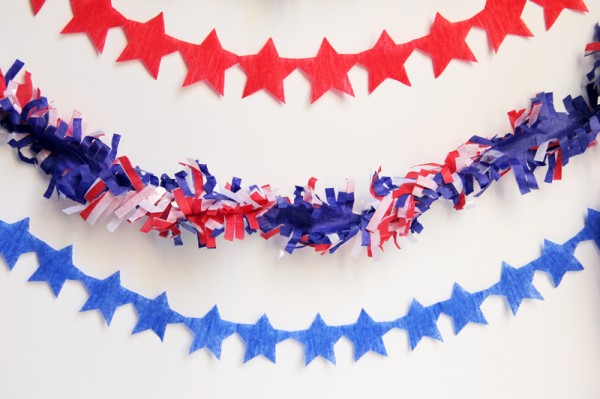
Red, White & Blue Felt Garland to make your 4th of July decor complete!
Take this fun Christmas decor post and use it with 4th of July Fabric to make a Fabric Garland!
Hope your 4th of July is full of fun, great food, and creative crafts! And, don’t forget what it’s all about…
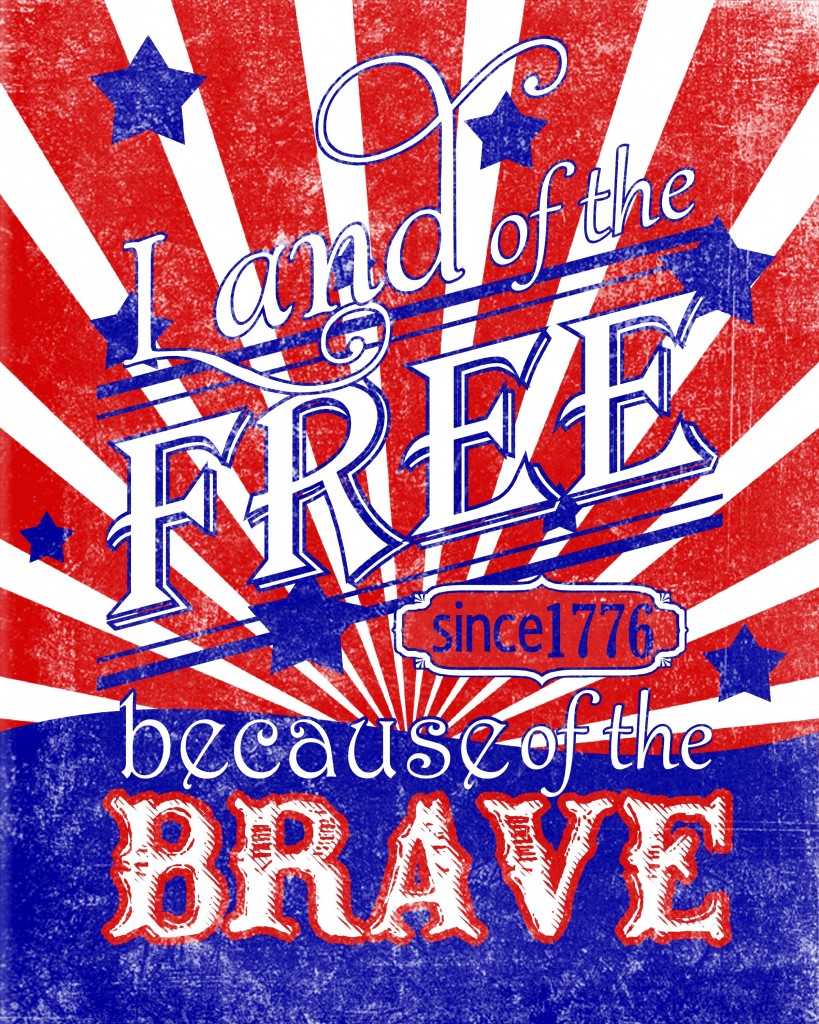
GOD BLESS AMERICA!!

…
Read More